MISC... Tips
Adding image on the list view area of mm 3 skins
this is an example of how to get the images to show up in mm 3 skins. they are in need of being put on the long strip image in little images of this size it is best to use seamless images for this.
the reason is that the mm 3 skins pull the image to the right and stop when the first area used, gets that first 1/4th inch of the image to fill that area's background.
the measurement was taken by the ruler bar of the photo editor.
when the image was zoomed in on for better editing. so the image will be pulled but only so far.
then the next 1/4th inch will be used to make the background. but it is pulled very far it looks like about, 6 times the length of the 1/4th inch.
So it will get a little fuzzy but as you can see it does work.
don't just shrink the image down sideways, you also have to shrink it down from the top in order to, keep the ratio of the image looking proper, when the skin exe pulls it out.
Image length for screen resolutions
In the command bar and other places that you can add and use images that stretch to the size of the users screen. If you use the default size you will notice on larger screens
the duel color's on those area's.
This is due to the default's image not being set large enough.
You need to when making the skin check the number in the width area for these type of area's images, and change it from the small 2 or 3 digit number to a 5 or 6 digit number.
Then also make the image stretch, for example; my skin's I make all my command bar images around 50020 wide, this allows for some one to have a screen width of that size and still get the command bar image.
The other images are status bar, and text area's and selection images that you see when you click on the playlists.
The short width is why you only see the selection color only cover a few columns in the playlist when using default sizes.
And the only way to check the size of the selection area and the text area's you add images in.
Is to test the skin and see how many columns it covers or how far the image goes when you type in the text areas.
There is also the panel image some work is done there also, but it does not need to be as wide since it is used for window panel's with fixed sizes, you need to make it big enough in both ways horizontal and vertical to fill in the window panel backgrounds, like on the "EQ" or the "Options" panels.
Image Map tips
1. Limit the amount of images on the image map and limit the chriscrossing of the lines on the selection of the images. by selecting the images most likely to be drwan first by the program, when it reads the information from the map. and put those images in the upper left hand corner to start with or the left side, and work your way to the right, putting the black or white images for the buttons focused bitmaps lastly on the right side. this seems to help when using image maps.
2. Also it seems to beable to preform best if you add the full image for the player to the image map when making an player of a fixed size. then put the buttons on the location you want them on the player. you need three buttons so make sure there is enough room for them on the player map. this will keep the oddly shapped buttons from showing any of the transparent background around the button's edges. because it is already to show the color of the buttons location on the player's background around its edges.
3. If your doing a resizeable skin then just copy the player's image map from the long resizeable skin you like and lay your images over its images. And don't add to the image map. For some reason adding to image maps sometimes causes them to crash. If you want to use more images just add them in as single images.
Skin's Color Picker Image
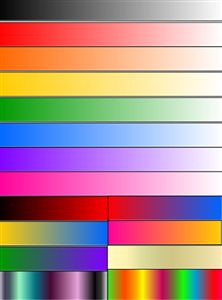
Use the below image in your skin's mskn file just to pick the color with the theme editor's color picker, and get the color's hex number to use in the theme editor. then remove the image from your skin's mskn file so you don't send it out with your skin, and making the skin file too large with needless images. Save this image below as an .bmp or .png file because this .jpg wont work in the theme editor.
