ThemeEditor

ThemeEditor is an editor for theme files used by Theme Engine, a Delphi/C++ skinning library developed by Eugene Kryukov and his company KSDev. MediaMonkey 3 implements Theme Engine 7 for its skins.
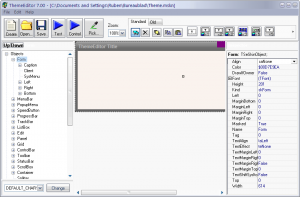
Version 7 of the theme editor is used to edit skins for MediaMonkey 3. This includes the main skin (Theme), the player skin (Player), the floating player skin (FloatPlayer) and the taskbar player skin (MicroPlayer).
![]() ThemeEditor 7 for MediaMonkey 3
ThemeEditor 7 for MediaMonkey 3
For MediaMonkey 2 skins (main skin), it's best to use the older version 4 of the theme editor. That's because the newer version 7 supports extra functions that might cause trouble for older skin files.
If you want to edit the player for MM2, see this forum post for guidelines and tools.
![]() ThemeEditor 4 for MediaMonkey 2
ThemeEditor 4 for MediaMonkey 2
Basics
ThemeEditor lets you:
- Define general information about the skin, like name, version, author, ...
- Edit the skin objects that specify the look of the different MediaMonkey interface elements.
- Create or delete totally new skin objects (they'll only be used if MediaMonkey implements them).
- Choose fonts and colors used in the skin.
General Skin Information
These properties can be entered in the properties pane at the right, when a top node is selected:
- Author
- Name of the creator of the skin
- AuthorEMail
- Email address of the skin's author
- AuthorURL
- Website address of the skin's author
- Name
- [undefined]
- SkinName
- Name of the skin
- SkinVersion
- Version number of the skin
- Tag
- [undefined]
Main Nodes
Objects
Here you see the different skin objects. Whether and how these skin objects are used totally depends on the implementation of the MediaMonkey Theme Engine, and on the skin type (main theme, player skin, floating player skin, micro player skin). See How to skin MediaMonkey v3.0 and higher for the technical documentation.
It's generally best to start with a complete skin as base, like the default MediaMonkey skin Glided. That way, you can start with a skin that has the complete objects structure already defined. This saves you a lot of time and trouble.
New objects can of course be added to an incomplete skin. Removing of used skin objects is strongly discouraged, as this results in incomplete skins and may also cause problems in MediaMonkey.
New buttons, images, labels, ... can be added to the skin structure, als child objects of other objects. New objects are created by using the buttons in the top-right "Standard" tab. See the Object Type Reference for detailed information about the object types, and their available properties.
Images
This node lists images that are available in the skin. These images can referenced by the skin objects from the Objects structure.
The listed images are embedded in the skin file, and don't link to any external files. The original file names are merely used as name for the image.
Using File > Export Bitmaps..., these images can be exported to bitmap (*.bmp) images. The resulting file names will be formated as ImageName.bmp.
New images can be added and then referenced in skin objects. Existing images can easily be replaced, without having to update existing references in the objects that use the skin. Images by default have the color magenta defined as transparent color. This can be changed, but only single-color transparency is supported; there's no alpha channel.
Fonts
Fonts and colors defined for interface elements, for which the font settings in the skin objects properties don't suffice or aren't applicable. Here you can change the font of menu items, list items, editbox text, ...
Colors
[These entries don't seem to be used in MediaMonkey]
SysColors
Color entries very similar to the system colors, and can be referenced from skin objects.
Known Issues
- ThemeEditor tends to crash quite often, especially during experimentation, so it's important to save your skin files at regular times. Also create backups of your created skin files.
- The lower-right pixel in any image will always be transparent. To avoid this problem, pad the image at right and at the bottom with 1 extra pixel, and in the "Bitmap Property" dialog create a selection that only includes the portion you want.
- Color values are used in the BGR (Blue Green Red) form, instead of the normal RGB (Red Green Blue) form. The color Blue can be specified as clBlue, but also as $00FF0000 (Hexadecimal number FF0000, meaning Blue=FF, Green=00, Red=00). The color picker will return 16711680, being the decimal representation of FF0000(hex).